Onboarding Guide

When you first launch SafeRag, you'll be guided through a setup process. This guide explains each step of the onboarding experience.

Onboarding Overview

The onboarding process consists of several steps:

  1. Welcome Slides - Introduction to SafeRag features
  2. User Mode Selection - Choose Single User or Multi-User mode
  3. Account Setup - Create your local account
  4. Recovery Codes - Save your account recovery codes
  5. Backend Startup - Initialize the local server
  6. Setup Checklist - Install Ollama and download an AI model

Welcome Slides

The first thing you'll see is a series of welcome slides introducing SafeRag's key features.

Slide 1: Welcome

A warm welcome to SafeRag with an overview of what the app does.

SafeRag welcome slide
Welcome to SafeRag

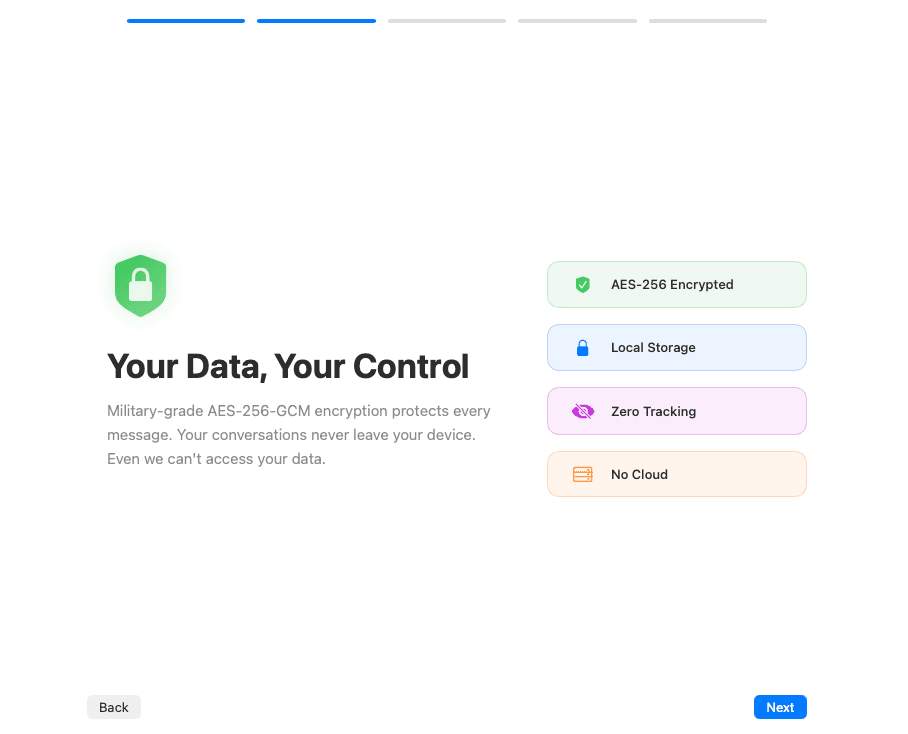
Slide 2: Your Data, Your Control

Learn about SafeRag's privacy features and how your data stays on your Mac.

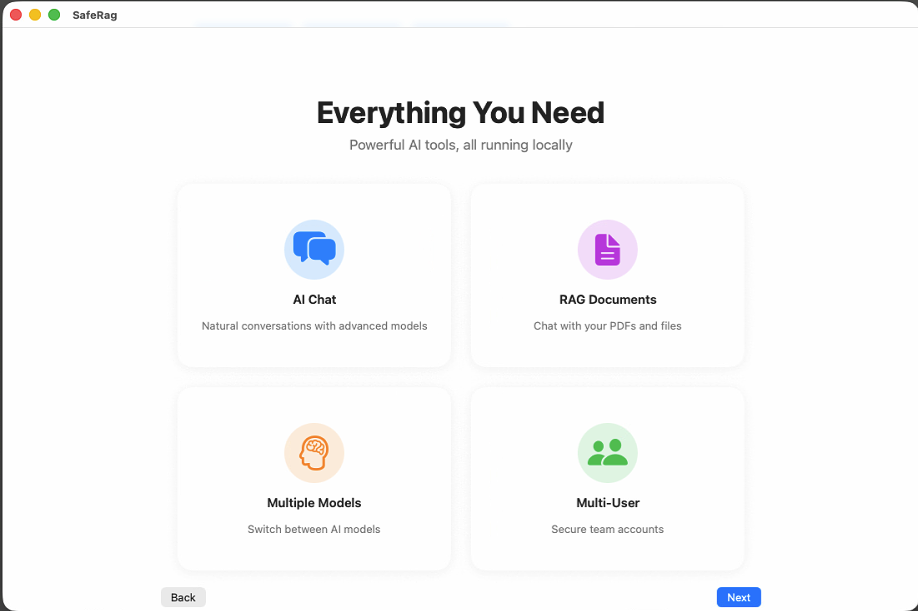
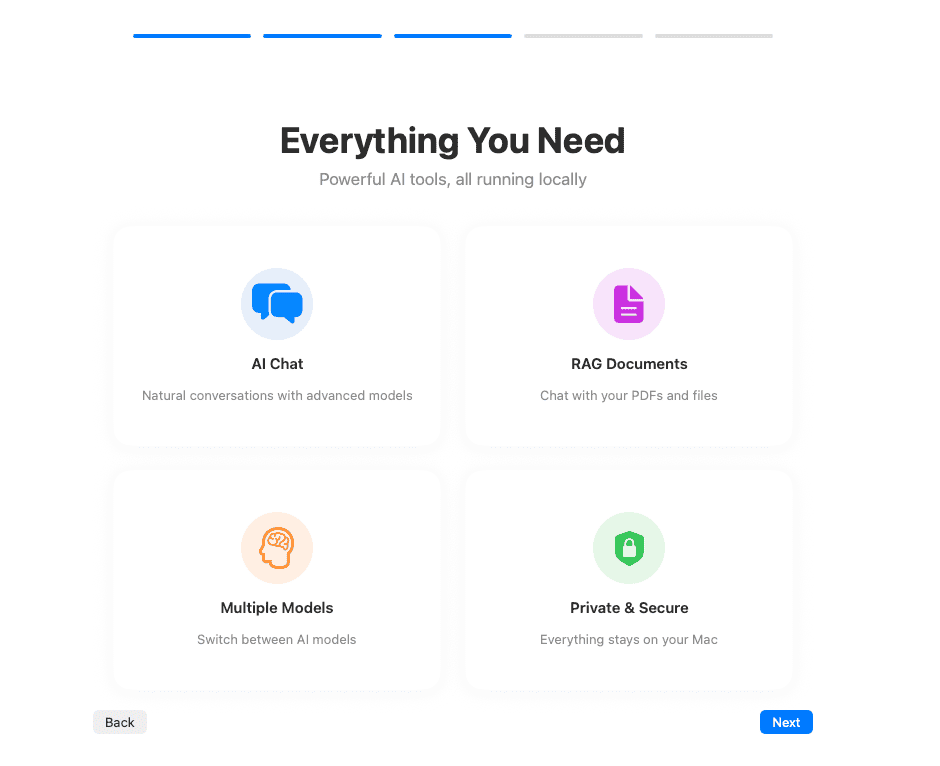
Slide 3: Everything You Need

Overview of the main features: Chat, RAG, Models, and Compliance tools.

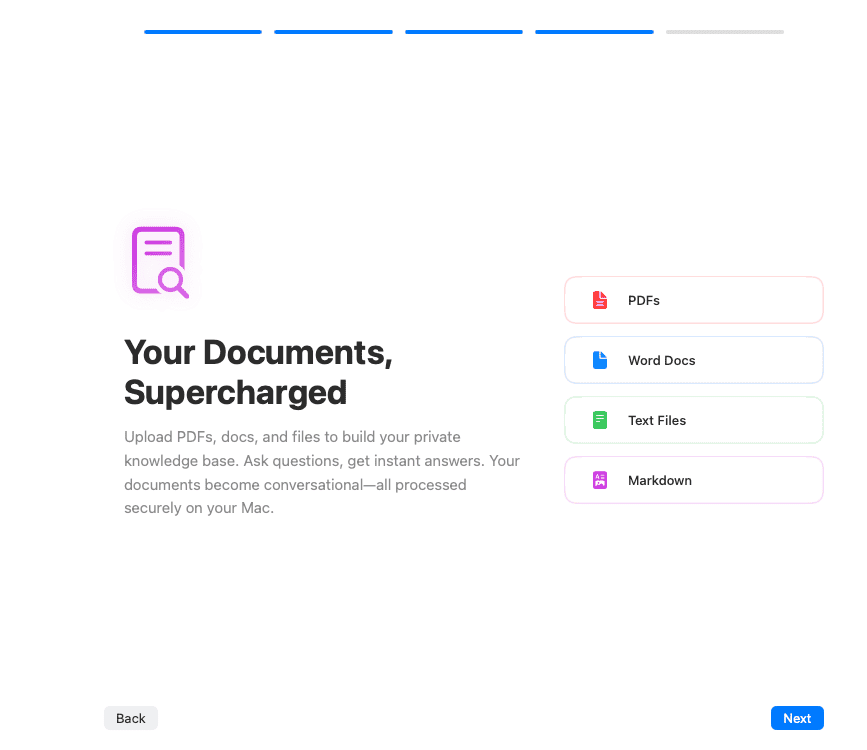
Slide 4: Your Documents, Supercharged

Information about document support and RAG capabilities.

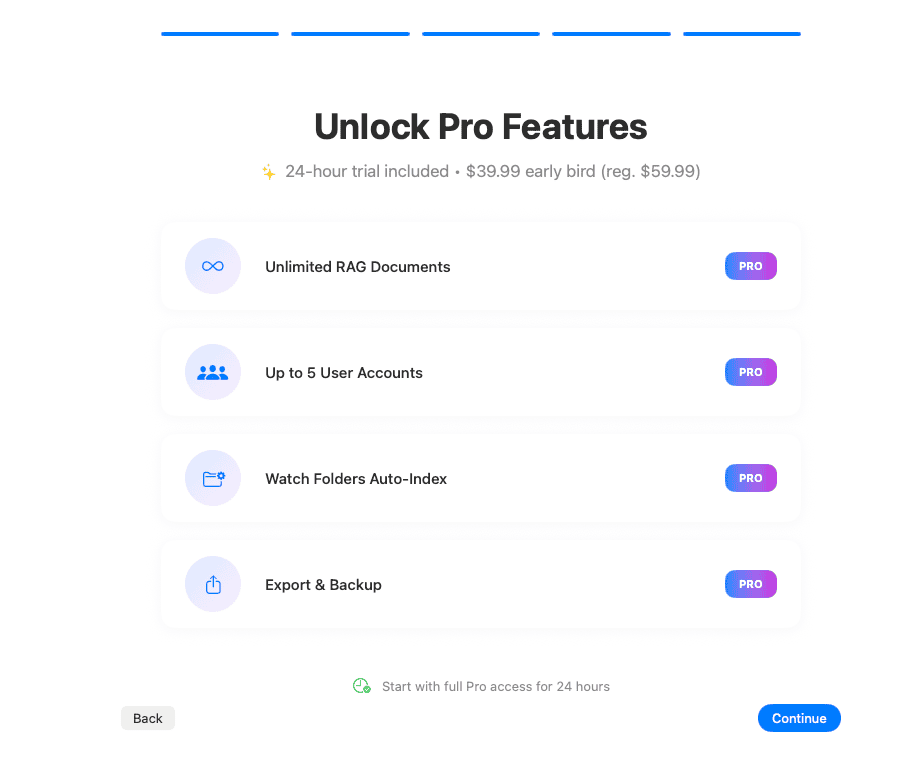
Slide 5: Pro Features Preview

A preview of Pro features available with a license or during the trial period.

💡 Navigate Slides
Use the Next button or swipe to move through the slides. You can also click Skip to jump directly to setup.

User Mode Selection

After the welcome slides, you'll choose how you want to use SafeRag:

👤

Single User Mode

Perfect for individual use. Simplified setup with minimal configuration. Great for personal productivity and privacy.

👥

Multi-User Mode Pro

For families and teams sharing a computer, or security-conscious users who want separate accounts. Includes admin controls and role-based access.

User mode selection screen
Choose between Single User and Multi-User mode
💡 Choosing a Mode
Single User is recommended for personal use. Choose Multi-User if you're sharing SafeRag with family or team members, or if you're a security-conscious user who wants separate account protection. You can change this setting later.

Account Setup

Single User Setup

In Single User mode, account setup is streamlined:

  • Enter your name (optional)
  • No password required (your Mac's security protects the app)
  • Click Continue to proceed
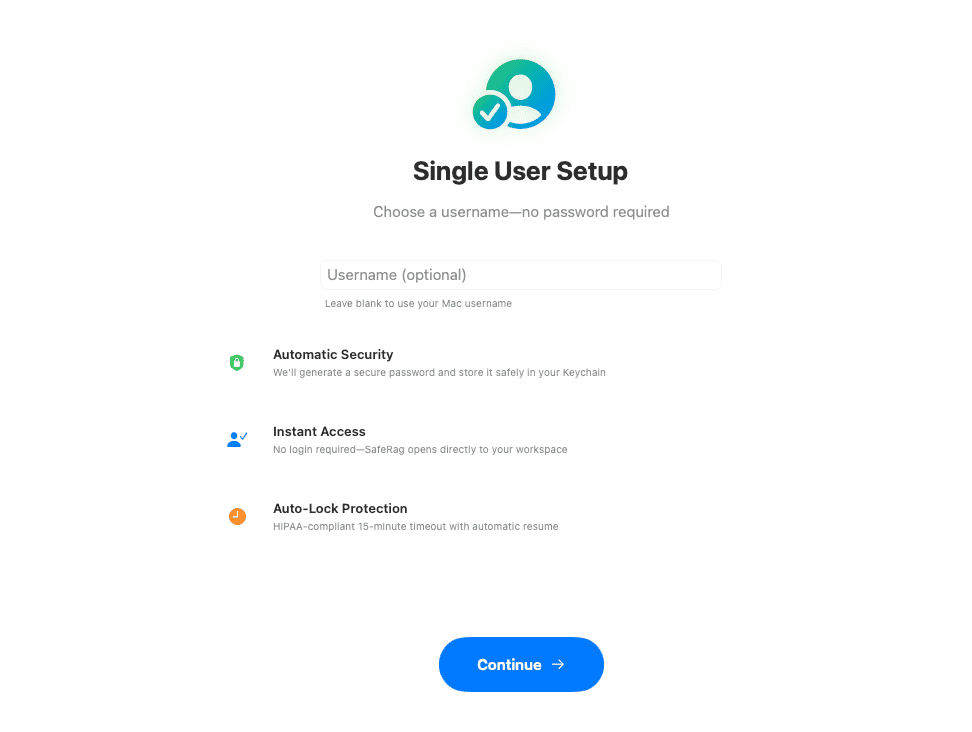
Multi-User Setup

In Multi-User mode, you'll create an admin account:

Enter Username

Choose a unique username for your account. This will be displayed throughout the app.

Enter Email (Optional)

Provide an email address for account recovery purposes. This is stored locally only.

Create Password

Create a secure password. The app shows password strength and requirements:

  • At least 8 characters
  • Contains uppercase and lowercase letters
  • Contains at least one number

Confirm Password

Re-enter your password to confirm it.

📸
Screenshot: Multi-User Account Setup
Capture the registration form showing username, email, password, and confirm password fields. Show the password requirements checklist visible.
multi-user-account-setup.png

Recovery Codes

In Multi-User mode, SafeRag generates 6 recovery codes after account creation. These codes are essential for account recovery if you forget your password.

⚠ Save Your Recovery Codes
Write down or save these codes immediately. They are shown only once and cannot be retrieved later. Store them in a secure location separate from your computer.

What Recovery Codes Do

  • Each code can be used once to reset your password
  • You have 6 codes, allowing up to 6 password resets
  • Codes are encrypted and stored securely

Saving Recovery Codes

Click the Download Codes button to save them as a text file, or manually copy them to a secure location like a password manager.

📸
Screenshot: Recovery Codes
Capture the recovery codes screen showing the 6 codes in a grid or list format, with the "Download Codes" button visible. Blur or redact the actual codes.
recovery-codes-screen.png

Backend Startup

After account setup, SafeRag initializes its local backend server. This server handles:

  • Document processing and indexing
  • RAG (Retrieval-Augmented Generation)
  • Communication with Ollama

You'll see a brief loading screen while the backend starts. This typically takes just a few seconds.

📸
Screenshot: Backend Startup
Capture the backend startup screen showing the loading indicator and status message like "Starting local server..." or similar.
backend-startup-loading.png

Setup Checklist

The final step ensures Ollama is installed and you have at least one AI model ready to use.

1. Install Ollama

If Ollama isn't already installed, SafeRag will prompt you to install it:

  • Click Install Ollama to download and install automatically
  • Or click the link to download manually from ollama.ai

If Ollama is already installed, you'll see a green checkmark.

Ollama installation step
Install Ollama to run AI models locally

2. Download an AI Model

You need at least one AI model to use SafeRag. The setup recommends starting with a model suitable for your Mac:

Model Size Best For
Llama 3.2 3B ~2 GB Macs with 8 GB RAM, fast responses
Llama 3.2 8B ~5 GB Balanced performance and quality
Mistral 7B ~4 GB Good all-around model

Click the model name to begin downloading. A progress bar shows the download status.
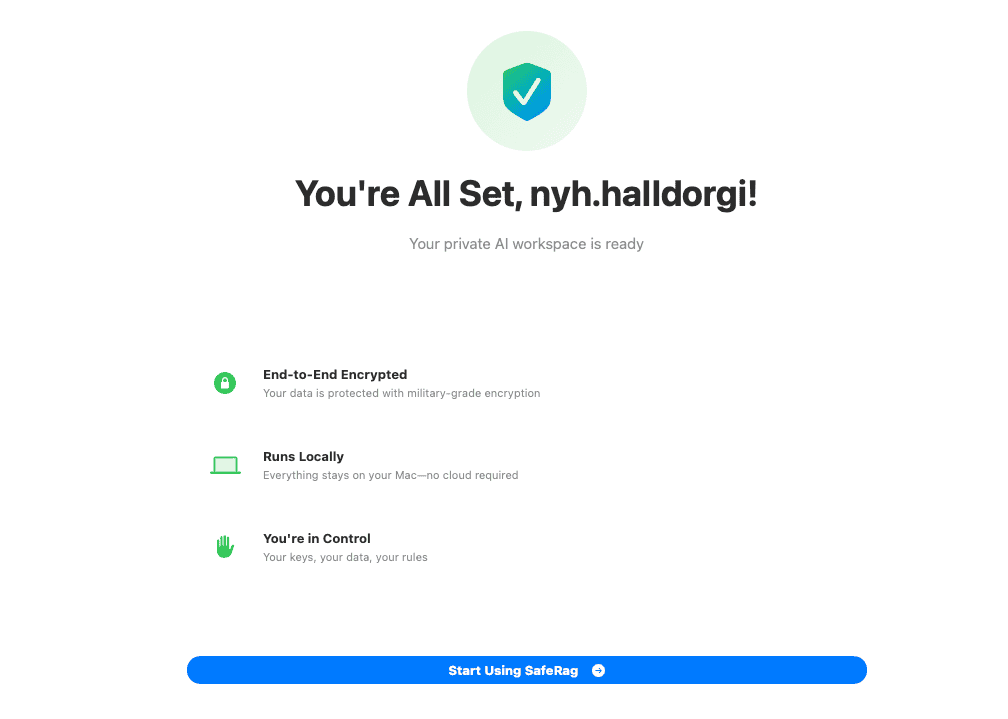
📸
Screenshot: Model Download
Capture the model download section showing available models with their sizes, and ideally a download progress bar for one model being downloaded.
model-download-progress.png
💡 Download More Later
You only need one model to get started. You can download additional models anytime from the Models section.

Onboarding Complete

Once Ollama is installed and a model is downloaded, you'll see the completion screen. Click Get Started to enter the main SafeRag interface.

Onboarding complete screen
Setup complete - click Get Started to begin

Free Trial

After onboarding, SafeRag starts a 24-hour free trial of all Pro features:

  • Unlimited document uploads
  • Watch Folders for automatic indexing
  • Multi-user support (up to 5 users)
  • Full audit logging
  • Data export capabilities

A trial banner appears at the top of the window showing time remaining. When the trial ends, you can continue using SafeRag's free features or enter a license key to unlock Pro.

Next Steps

You're now ready to use SafeRag! Here's what to explore next: